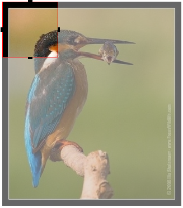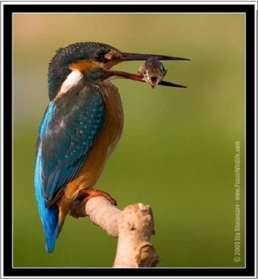
When you click the Crop button, a resizable rectangle displays for selecting an image area. Click and drag the crop tool handles (the black rectangles on the crop border, shown below) to change the dimensions of the selected area. Current dimensions display in pixels in the Width and Height boxes in the lower part of the interface.
You can click and drag to move a defined crop area.

|
Before |
After Crop |

|

|
You can also enter new values in pixels to change crop width and height.

Click the Apply button to remove the portion of the image outside the selection area and view the cropped image, or click Cancel to discard.
Click Saveto keep your changes and update the image.
With the introduction of multiple alternate image sizes, the Crop Tool has been enhanced to automatically adjust to the Max Size(s) as set in the Primary and Alternate image sizes if your gallery restrains images by size height, width or both. This applies to sizes where either one size in defined or a range (For Example: Between 100 pixels and 200 pixels)
When the Resize tool is selected, additional information is displayed at the bottom of the editor. You may manually set the Width and Height and optionally choose to force the dimensions to keep the same aspect ration as the image or in some cases the ration based on the primary height and width of the gallery. Keeping the Aspect Ratio is generally recommended when the ratio is based on the original image size, as it will prevent the image from becoming distorted.

When the Crop tool is selected, there are more options available to control the crop operation. In addition to the Width, Height and Keep Aspect Ratio, there are 2 additional checkboxes that will affect how the cropping tool behaves.
Depending on your image, the space it needs to fill and the artistic capabilities of the contributor, these 2 options may be helpful in creating the perfect image for your web site.

To help you determine the optimum outcome when you need to crop an image, the Crop rectangle changes color depending on the settings and the size of the image. If you "Allow cropping rectangle to be bigger than the constraint and scale the image down", and you size the rectangle larger then the constraint size, the rectangle color turns blue.

If you "Allow cropping rectangle to be smaller than the constraint and scale the image up (Not recommended)" the cropping rectangle color turns red. Scaling an image up is not recommended because it will most likely make the image grainy.

When the Crop Rectangle is sized so that the selection will neither be sized smaller or larger, the border color is green.

Related Links
You can download PDF versions of the Content Contributor's, Administrator's, and Elements Reference documents from the support section of paperthin.com (requires login).
For technical support: